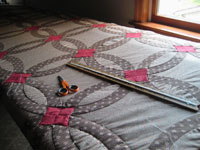
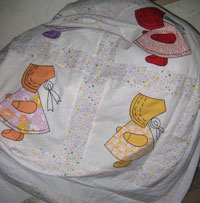
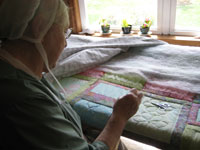
Creating your own handmade Amish quilt is a fun and enjoyable craft that can be performed by any age group and skill level. By creating your own Amish quilt you are participating in an activity that has been passed down from generation to generation as an expression of creativity, individuality and emotion. While you can keep your quilt for yourself once it is completed, you may want to share it with a family member or friend as a gift to celebrate a special occasion or life event such as a wedding or birth. The quilt may be used everyday or be kept as a heirloom to be passed down from generation to generation.

Making your own Amish quilt is a very hands-on and time consuming project that blends skill with art. Although beginning your very first quilt may seem daunting and too difficult; if you take your time, relax and follow some step-by-step instructions you will find it to be rewarding. Just like with any task you try for the first time, if you take your time and continue to work diligently; you will have finished in no time.
Here are some of the basic steps to creating your own Amish quilt. There are many resources online or through books that can also provide you with instructions for many different skill levels and designs on quilt. It is recommended that you research many different resources to find the skill level and design that works for you.
The first step in your Amish quilt is to pick your design. There are many different factors that will come to play in the choosing of your quilt design. You will need to decide whether or not this quilt is for an adult or for a child to help you decide on the size of your finished project. The Amish have many designs for the quilt that are used to symbolize a special event in ones life as well. You can choose between a patchwork quilt, an appliqué quilt or an embroidered quilt. If this is your first quilt you may find that a patchwork Amish quilt is one of the easier designs for beginners. You can search the internet or go to the library to research the different designs that were used and find the one that is perfect for your intent with your Amish quilt.

Once you have decided on a design, the next thing that you will need to choose if your fabrics and colors that will be used on your Amish quilt. If you have a chosen an older, traditional Amish quilt pattern you will need to stay with the more traditional fabrics and colors that the Amish used on their quilts. It wasn’t until recently that the Amish began to use bolder colors and fabrics, so that is one thing to consider. Different colors and fabrics can be used to evoke a certain emotion with your quilt. Pale pastels are more of a calming and sweet look to a quilt for a baby’s birth or a marriage ceremony quilt; while bright and bold colors are an exciting touch to a young child’s quilt or a quilt used to celebrate graduation.
Most Amish quilts are made from 100% cotton or a cotton blend. Cotton is a very strong, versatile and natural fabric to work with. Cotton has some other benefits such as being basically allergy free and non-flammable. The cotton mixes or synthetics are a little more difficult to work with for a beginner because they have a tendency to pucker, crease or create a spongy feel. Many of the cotton mixes are available in a wider variety of color and texture, so if you are wanting to implement these into your Amish quilt you may consider a patchwork quilt that would allow you to incorporate these fabrics and colors in a staggering pattern. Another thing to consider is the potential use of your Amish quilt. Will this be a quilt that is put up for heirloom use or will it be used to wrap up in or lay around in? Your fabric choice would be affected by this because you will want a softer fabric if this is a quilt that will be used.
The next steps to creating your Amish quilt are the meat of the project and the most time consuming. You will need to cut your template out, mark and cut your fabric and assemble your quilt block. You would most likely use a template if you are using non-rectangular pieces of fabric or are making and appliqué Amish quilt. Using a fabric marker is an important step in the overall appearance of your quilt. It is crucial that all you’re your piece of your design are marked to ensure that your design is in order and no pieces are upside down as you begin to create your quilt. Remember to always use a pair of very sharp scissors when cutting the material. If your scissors become blunt it could tear or roughen the edge of the fabric shape. Use straight pins to attach your design as the pieces are cut so that you can make sure your pieces of your Amish quilt flow well.

The next steps are to assemble your Amish quilt block and top. When you are sewing the pieces of your quilt block together here are a few easy tips to help:
Always make sure that the correct side of the material are facing each other, such as opening a book. Keep your straight pins close to prevent the material from puckering or slackening Press the seam with a warm iron before and after sewing the pieces together to create a smooth and even block. When pressing a sewn seam, always press the seam in the same direction. It will help to assemble the entire Amish quilt if they are pressed in the same style.
The next steps to creating your Amish quilt will be covered in part two of this article. The steps that will be covered are assembling your quilt top, choosing the quilt batting, assembling the quilt sandwich, binding the quilt and the different choices of Amish quilting method to help you to decide between hand quilting and machine quilting.
